

 Customize a Flash Video Player with playlist in the easiest way
Many people think it’s very difficult to realize playing videos on their own website, blog, forum or e-store, because it’s difficult for them, who don’t know any coding knowledge, to customize an own-branded web FLV player like YouTube player for web. So if they want to play videos on their own website, they have to compress their videos size to 10 mins or smaller and upload to YouTube, and then get the embed codes of the videos for embedding onto website. Although they know the drawbacks like the videos will belong to YouTube, the video quality will be lower, etc.
In fact, it’s not difficult to customize a skinning web FLV player any more. Here, I will introduce a way to customize a skinning web FLV player with full-screen capability and playlist. At present, this way is the easiest one, which only needs a few mouse clicks.
Demo
Below is the tutorial shows how to customize the above flash video player with a few mouse-clicks on PlayerDIY Web Player.
Step 1: Open PlayerDIY Web Player on your PC
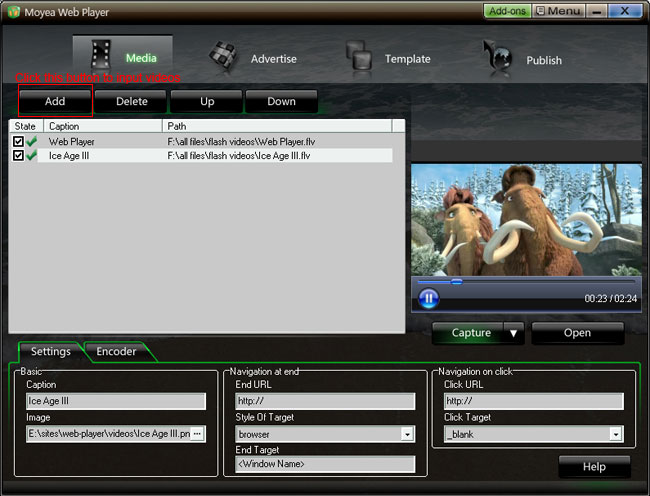
Step 2: Input flash videos you want to play on webpage into PlayerDIY Web Player (If your videos are not flash videos, please convert them to).
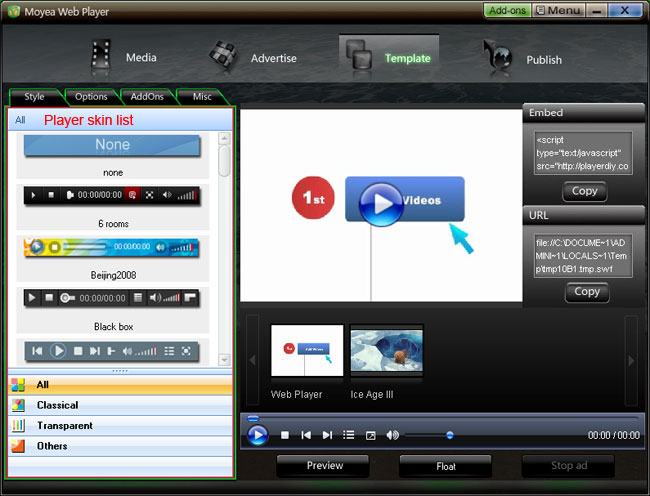
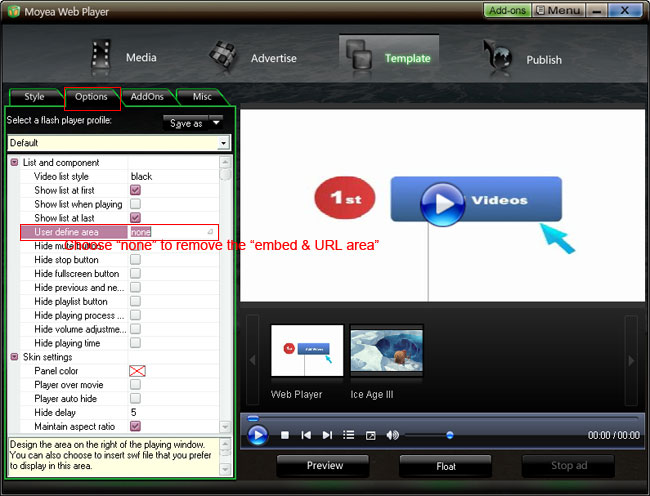
Step 3: Choose a player skin(here, I use the default one), and remove the embed code area.
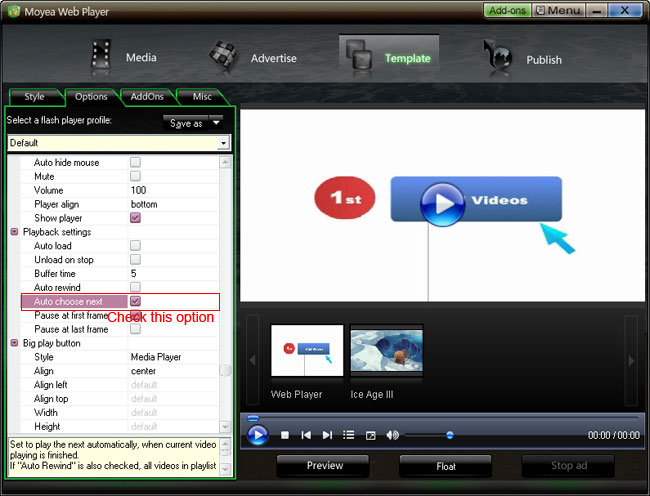
Check "Auto choose next" to make the player can play next video automatically
Step 4: Click “Publish” button to generate a web flash video player and other related files (Note: if you want to get a separate playlist file, please check “Out File”)
Step 5: Upload all the published files except the index.html file, to the same folder of your web server
Step 6: Embed the generated player onto your webpage with the embed code below (you can get it on the generated index.html file):
<div id="flashcontent">Player will show here</div>
<script type="text/javascript">
var so = new SWFObject('mwplayer.swf','player','500','450','9');
so.addParam('wmode','opaque');
so.addParam('quality','high');
so.addParam('allowfullscreen','true');
so.addParam('allowscriptaccess','always');
so.write("flashcontent");
</script>
Note:
1. No <object> </object> tag outside the embed code.
2.
mwplayer.swf is the actual flash video player. If it resides in another directory, then point to it with a relative path (e.g. /player/mwplayer.swf) or an absolute path (e.g. http://www.yourdomain.com/player/mwplayer.swf ).
For example:
<script type="text/javascript" src="http://www.yourdomain.com/players/swfobject.js"></script>
<div id="flashcontent">Player will show here</div>
<script type="text/javascript">
var so = new SWFObject('http://www.yourdomain.com/players/mwplayer.swf','player','450','400','9');
so.addParam('wmode','opaque');
so.addParam('quality','high');
so.addParam('allowfullscreen','true');
so.addParam('allowscriptaccess','always');
so.write("flashcontent");
</script>
Step 7: The flash video player will appear on your website. Have a look at the above demo.


- Tutorials
- Customize a web FLV Player in the easiest way
- Edit the template of player skin
- Play a specific video in a new page
- Customize video banner onto webpage
- Make your custome player skin work in PlayerDIY Web Player
- Edit flash video player with HTML
- Add flash videos onto WordPress
- Add multiple flash video players onto a webpage
- How to Make FLV Player with Flash Professional 8?
- Use multiple playlists with one FLV player?