 Customize playlist outside flash video player on website
|
Version: 2.0
Version History |
Compatible With: PlayerDIY Web Player V2.0 and up |
| Published on: Mar.5th, 2010 | Developer: PlayerDIY Software | |
Introduction:
Ext Playlist Plugin provides easy way to enable player user to customize personalized playlist outside web flash video player, and put it on anywhere of the webpage they want it to be.
Key Features:
3 flexible ways to create any customized-look external playlist.
Multiple external playlists can be created for one flash video player.
Supports to display video thumbnail, video title, video description and length by default.
Note: The generated external playlist is based on web server, so the final effect can only be viewed on web server. However, if you are using PlayerDIY Web Player V2.3.0.3 and up versions, the effect can be immediately previewed on local site. Click setting button shown below on "Publish" interface to set.

Limitation of free trial version:
A watermark with hyperlink appears at the right of the custom flash video player
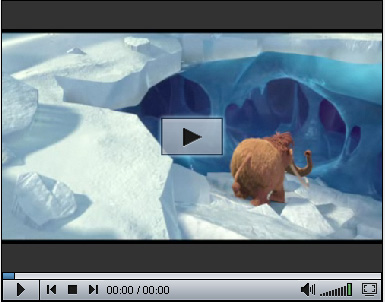
The demo below shows the "Youtube-Look" external playlist created by PlayerDIY Extplaylist Plugin:
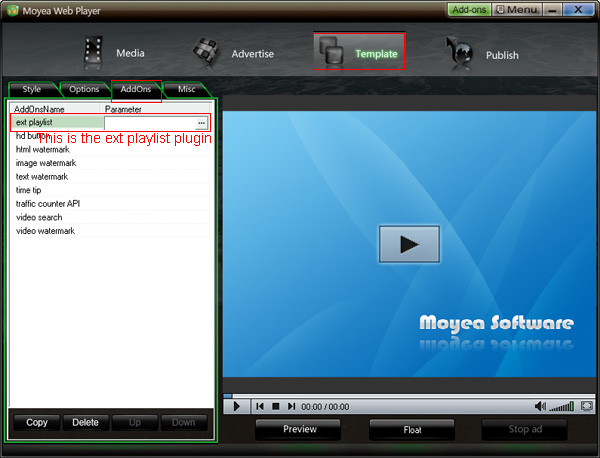
Where this plugin appears:
After installation, this Ext Playlist Plugin will appear on the following interface of PlayerDIY Web Player.
How to implement above demo?
To implement above demo, when customizing flash video player with PlayerDIY Web Player, you also need to do the following extra steps.
Step 1: After inputting flash videos, choose "None" as the value of "video list style" option from the following interface to remove the interior playlist. This is an optional step just for the best aesthetic view, users can also keep the interior playlist.
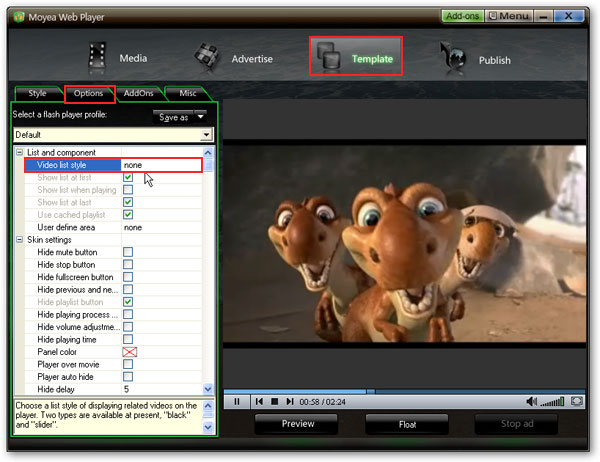
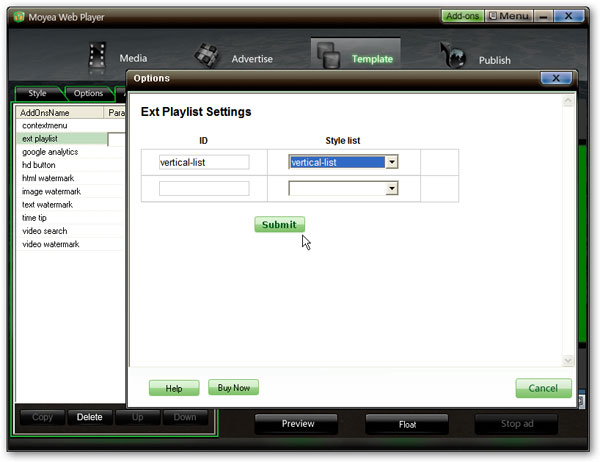
Step 2: Click "![]() " button indicated above to enter the setting page of Ext Playlist Plugin.
" button indicated above to enter the setting page of Ext Playlist Plugin.
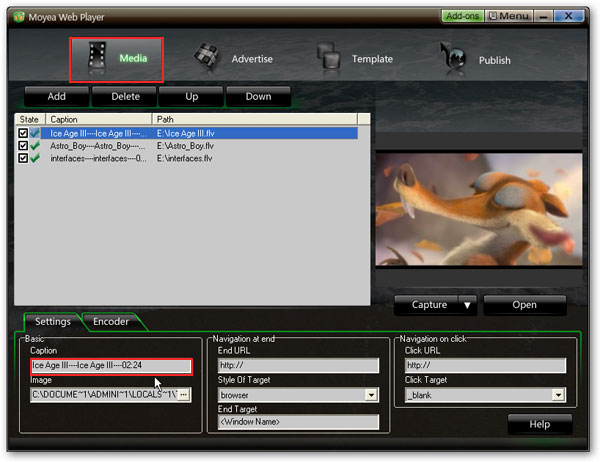
Step 3: Go back to "Media" interface and you will discover the caption of each added video is automatically filled in the format of "video title----video description----video length". Manually revise the caption info if you prefer the customized one, like the example shown in demo. Otherwise just let it be done by default.
Step 4: Click "Publish" and then just paste the generated embed code for the customized flash video player with external playlist to anywhere you want it to be on your webpage. Then we can get a flash video player with the external playlist.
Please note: there is a little difference in implementing the same demo if you are using the Ext Playlist Plugin V1.0. Click here to view the tutorial using the previous version.
Information about the style lists on setting page:
You might have found that this plugin provides three style lists for choosing. Then what's the difference between them? The information below will give you the answer.
1. vertical-list:
This option provides the easiest way for customizing external playlist, all you need to do is give it an ID and click "Submit" button. But with this option, there is no way to edit the playlist style to match your website, as the .css file of it is hosted in our web server. However, you can download this .css file here and edit it as the way you want, but in this situation, you have to choose "vertical-list customize" on the setting page.
2. vertical-list customize:
If you want to edit the .css file to match your web style or want to host the .css file in your own web sever, you have to choose this option, and put the file path into the "CSS" form to point to it, for example: mwplayer_extplaylist_vertical.css. note: this css file must be in the same directory with webpage on which display the custom playlist.
Note:
a. Please do not change the ID or class name in the .css file. Otherwise, it'll not work
with PlayerDIY Web Player
3. customize:
This option is designed for professional users who can write .css code or JS to customize the external playlist. You can put anything into the form to customize your playlist.
Interpretations of the terms on setting page:
- Style: the code for customizing playlist style. It gives a basic structure and style form that would apply to all the items in the list and it can be adopted repeatedly if there is more than one item. Please see the example below
- Begin Style: the code before "Style" code, e.g.: <table> or <div>
- End Style: the code behind "Style" code, e.g.: </table> or </div>
- Begin JS: the JS code before "Style" code
- End JS: the JS code behind "Style" code
- CSS: indicates the path of the .css file for the playlist
- JS: indicates the path of the JS file you write for the playlist
- Caption Format: indicates the format of video name or video title, it supports Macros like {caption}, {duration}, {Width}, {Height}, {VideoCodec}, {VideoCodecText}, {AudioCodec}, {AudioCodecText}, {FrameCount}, {FrameRate}.
- Replace from: indicates the original div code in index.html that needs to be replaced.
- Replace to: indicates the target div code you want to replace to.
For example, if you choose this option to implement above demo, then you only need to put the path of the .css file into the "CSS" form, and fill the following code into the "Style" form.
Code for "Style" form:
<div class="grey{index%2}" onclick="{play_item_func}">
<table border="0" cellspacing="0" cellpadding="0"><tr>
<td><img src="{image}" /></td>
<td><dl>
<dt class="mwplayer_extplaylist_vertical_player_title">{caption}</dt>
<dd class="mwplayer_extplaylist_vertical_player_say">{caption.1}</dd>
<dd class="mwplayer_extplaylist_vertical_player_time">{caption.2}</dd>
</dl></td></tr></table></div>
Interpretations of the terms in the above code:
- index: indicates video index in playlist, directly specify which video to be played in playlist
- index+n: indicates index plus n
- index%n: indicates index modulo n
- play_item_func: the function for player to play the selected video
- image: A picture of a video, which will show in the playlist and show on the screen before the video playing.
- caption: indicates the video name or video tittle
- caption.n: indicates subsections of caption, divided by "----", the value can be totally customized by customer themselves. Please refer to the first step of above tutorial "Fill the caption".
Please click here to learn more information about other terms on "Media" interface of PlayerDIY Web Player.
Please check the following 3 examples to view more possible playlist style you can customize with PlayerDIY Ext Playlist Plugin.
http://playerdiy.com/test/extplaylist/1/
http://playerdiy.com/test/extplaylist/2/
http://playerdiy.com/test/extplaylist/3/


- Set control-bar color to match website
- Set background color of player
- Set the position of control bar
- Customize Preloader button
- Hide control bar automatically
- Remove the "Embed & URL" Area
- Hide mouse automatically
- Hide playing time
- Hide playlist icon
- Hide previous and next icons
- Hide playing process bar
- Customize right-click menu

